Are you looking to add next previous post navigation links in Genesis? Many other brand themes include this feature by default. But if you are using Genesis Child themes, you need to customize your function.php file.
In this tutorial, I am going to use a couple of lines of code snippet that will help us add next previous post navigation links in Genesis child theme.
Thereafter, I will show you how to style your post navigation links using cascading stylesheet (CSS).
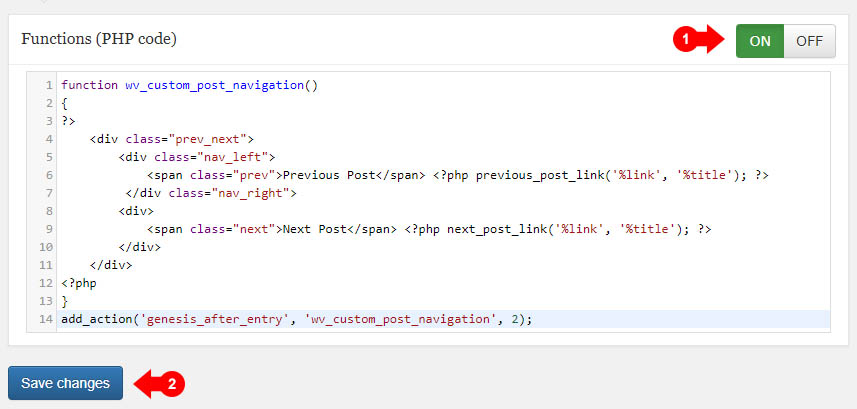
In order to implement this, open functions.php file of your Genesis child theme and add the following code:
The code above positions the next previous post navigation links in Genesis right before the Comments section. You can use the Genesis hook, as long as it makes sense, to place it anywhere on the single post you’d like.
Style The Next/Previous Post Links
Copy and paste the CSS code below in style.css file of the Genesis child theme:
.prev_next
 {
     overflow: auto;
     margin: 10px 0;
     padding: 5px 0;
 }
 .prev_next span.next
 {
     background-color: #333;
     padding: 10px;
     font-weight:700;
     text-transform:uppercase;
     display: block;
     margin-bottom: 5px;
 }
 .prev_next span.prev
 {
     background-color: #333;
     padding: 10px;
     font-weight:700;
     text-transform:uppercase;
     display: block;
     margin-bottom: 5px;
 }
 .prev_next a
 {
     text-decoration: none;
 }
 .prev_next a:hover
 {
     text-decoration: underline;
     font-weight: 600;
 }
 .nav_left
 {
     width: 50%;
     float: left;
 }
 .nav_right
 {
     width: 50%;
     float: right;
     text-align: right;
 }
If you are adding these next previous post navigation links in live mode, you can also use your browser’s Developer Tools option to inspect and style your links.
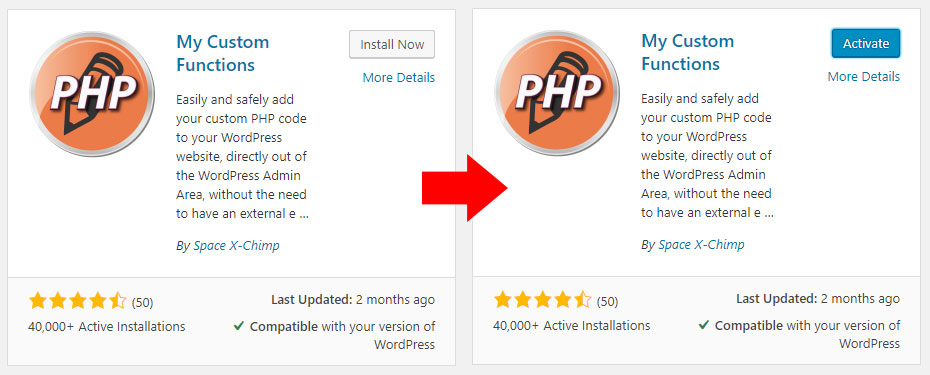
Moreover, if you don’t want to modify the functions.php file, you can download a WordPress plugin called My Custom Functions. You just need to install and activate the plugin to get started.
My Custom Functions Plugin is easy to use, an intuitive WordPress plugin that gives you control over the custom PHP code. With just a few clicks, you can safely add your custom PHP code to your WordPress website without having to modify your functions.php file.
Here are the steps:
1. Navigate to the WordPress plugins repository, search and download “My Custom Function” plugin.

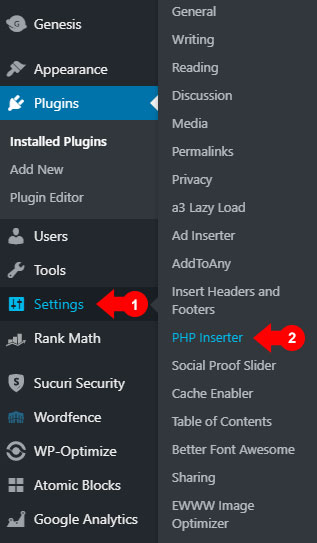
2. Navigate to the Settings » PHP Inserter

3. Enter the PHP code » Turn on custom code functions and click save.

Other Genesis Related Posts
So that’s it for now! I hope you will find this tutorial useful to add a little custom feel to your site.


 How to Upload SVG to WordPress – 3 Easy Methods
Leave a Reply