Introduction
Lighttpd is a free, open-source web server which is also known as Lighty. It is a fast, secure, compliant, and extremely flexible webserver optimized for speed.
Compared to other web-servers, Lighttpd consumes very less server resources. When it is installed alongside PHP and MySQL or MariaDB, it can serve millions of connections.
Prerequisites
- Ubuntu 20.04 LTS x64 server instance
- Access to SSH
- HTTP and HTTPS Connectivity
- root privileges / sudo privileges
How to Install Lighttpd on Ubuntu
Step #1: Upgrade your system
First things first, always update your server before installing any software, application or making changes.
To do this, run:
sudo apt-get update && sudo apt-get upgrade && sudo apt-get dist-upgrade && sudo apt-get autoremove
Step #2: Add PHP Repository
After updating the server, we need to add the public repository hosted by one of the Ubuntu and PHP developers. This will help us get support for the latest version of PHP.
To do that run:
add-apt-repository -y ppa:ondrej/php
After adding the repository, update the local apt cache by running:
apt update
Step #3: Install Lighttpd
To install lighttpd, we can use the apt package manager. Run:
sudo apt install lighttpd
Now, check the version of lighttpd you have installed by running:
lighttpd -version
If you’re on Ubuntu 20.04 LTE, it should return:
lighttpd/1.4.45 (ssl) - a light and fast webserver
Build-Date: May 10 2023 23:19:09
With Lighttpd now installed, we need to enable the services to automatically start at boot. To do that, run:
sudo systemctl start lighttpd
sudo systemctl enable lighttpd
Now, check the status by running:
systemctl status lighttpd
You should get the following:
● lighttpd.service - Lighttpd Daemon
   Loaded: loaded (/lib/systemd/system/lighttpd.service; enabled; vendor preset:
   Active: active (running) since Wed 2023-05-10 23:20:48 EAT; 2min ago
 Main PID: 9695 (lighttpd)
    Tasks: 1 (limit: 4915)
   CGroup: /system.slice/lighttpd.service
           └─9695 /usr/sbin/lighttpd -D -f /etc/lighttpd/lighttpd.conf

Cam 09 23:20:48 Ubuntu-18 systemd[1]: Starting Lighttpd Daemon...
Cam 09 23:20:48 Ubuntu-18 systemd[1]: Started Lighttpd Daemon.
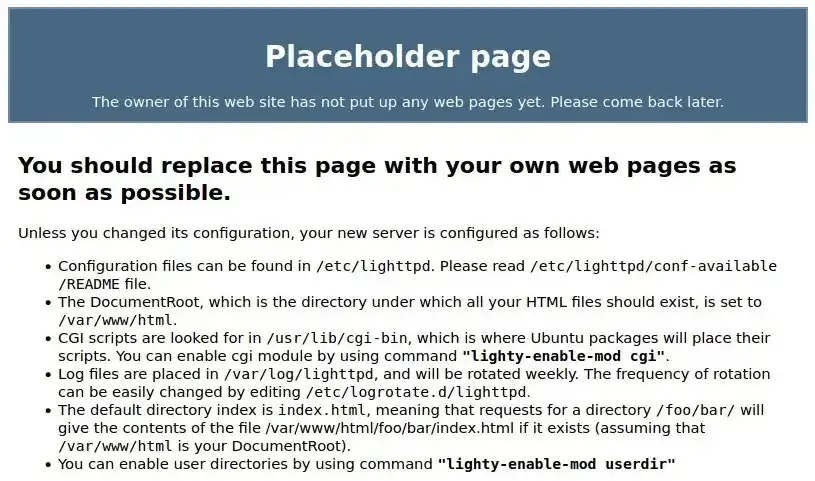
You can check the installation in your browser by entering the IP address of your server i.e., http://<Server_IP_Address>.
You should see a placeholder page showing something like this:

Moreover, lighttpd is managed as a system service. You can start it by running:
sudo systemctl start lighttpd
To stop lighttpd, run:
sudo systemctl stop lighttpd
To check the status of the service, run:
sudo systemctl status lighttpd
Step #4: Install PHP and Extensions
Now, install PHP with all its extensions by running:
sudo apt install php php-cgi php-cli php-fpm php-curl php-gd php-mysql php-mbstring zip unzip
To confirm PHP installation, run:
php --version
You will see the following output:
PHP 7.4.3 (cli) (built: May 10 2023 23:30:52) ( NTS )
Copyright (c) The PHP Group
Zend Engine v3.4.0, Copyright (c) Zend Technologies
    with Zend OPcache v7.4.3, Copyright (c), by Zend Technologies
Which means we have installed PHP with great ease.
To install the latest version of the PHP on Ubuntu 20.04 LTE or 18.04 LTE, install the Personal Package Archive by running:
sudo add-apt-repository ppa:ondrej/php
sudo apt update
After adding the PPA, check the version of PHP installed by running:
php –version
You should see the output something like this:
PHP 8.1.5 (cli) (built: Apr 21 2022 10:14:25) (NTS)
Copyright (c) The PHP Group
Zend Engine v4.1.5, Copyright (c) Zend Technologies
    with Zend OPcache v8.1.5, Copyright (c), by Zend Technologies
Now, we need to enable PHP-FPM and FastCGI for Lighttpd.
To enable the PHP-FPM module, navigate to the /etc/php/*/fpm/pool.d/ directory and edit the www.conf using the text editor of your choice. Here we need to change listen = /run/php/php-fpm.sock to listen = 127.0.0.1:9000.
Edit the www.conf by running:
sudo vim /etc/php/*/fpm/pool.d/www.conf
Now, locate the line:
listen = /run/php/php*-fpm.sock
And change this to:
listen = 127.0.0.1:9000
Save changes and exit from the editing mode.
To list all loaded PHP Modules, run the command:
php -m
Now we need to enable the FastCGI module.
To do that locate the FastCGI configuration file located at /etc/lighttpd/conf-available/15-fastcgi-php.conf.
Edit the 15-fastcgi-php.conf using your favorite text editor by running:
sudo vim /etc/lighttpd/conf-available/15-fastcgi-php.conf
Locate the following lines under the fastcgi.server.
"bin-path" => "/usr/bin/php-cgi",
"socket" => "/var/run/lighttpd/php.socket",
Replace the lines with the following:
"host" => "127.0.0.1",
"port" => "9000",
After the changes, save and exit from the editor.
Step #5: Test Lighttpd with PHP info file
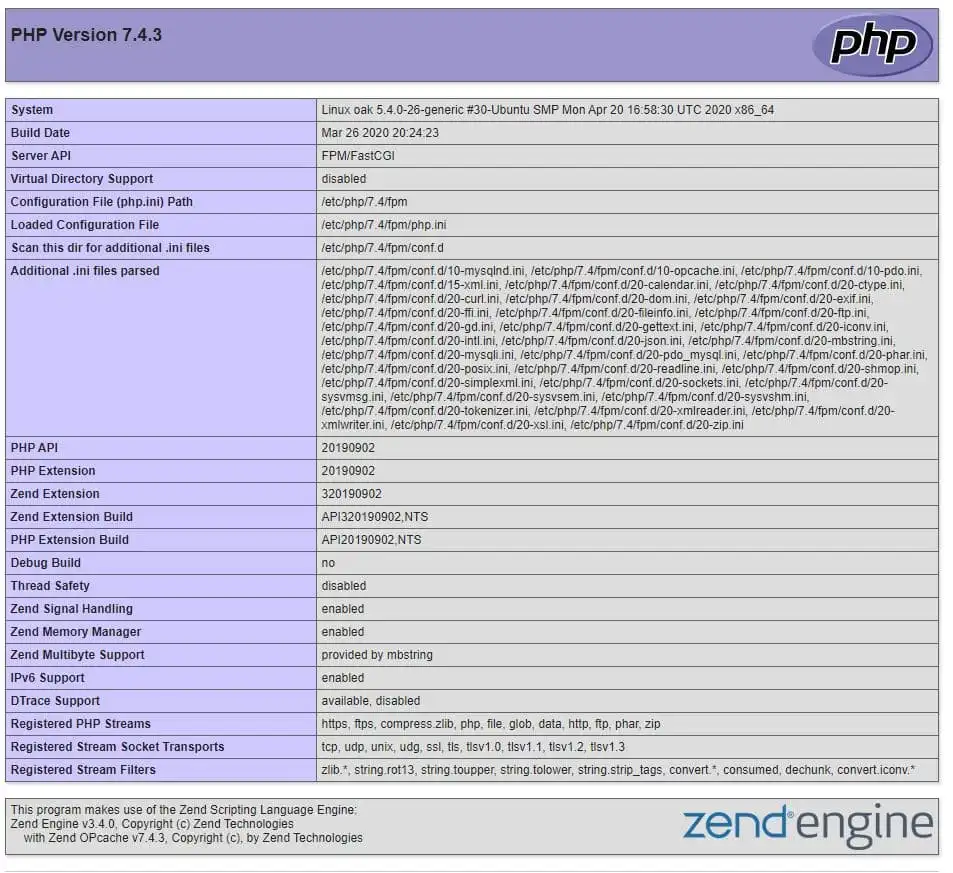
To test our installation and configuration, let’s create a simple PHP info file that will show the PHP version-related information along with the web server and the PHP extensions.
To create a PHP info file, run:
sudo vim /var/www/html/phpinfo.php
Now, inside this file, add the following lines of code:
<?php
 phpinfo();
 ?>
Exit the editing mode by pressing ESC and save the file by typing :wq! and press enter.
The next thing we need to do is to make Lighttpd the owner of the directory that we just created with the phpinfo.php file.
To do that, run:
sudo chown -R www-data:www-data /var/www/html/
sudo chmod -R 755 /var/www/html/
Now, add the mod_fastcgi module to your server configuration by editing the /etc/lighttpd/lighttpd.conf file by running:
sudo vim /etc/lighttpd/lighttpd.conf
Add mod_fastcgi to the server.modules section:
server.modules              = (
            "mod_access",
            "mod_openssl",
            "mod_accesslog",
            "mod_fastcgi",
            "mod_rewrite",
            "mod_auth"
)
To configure fastcgi.server, add the following:
fastcgi.server = ( ".php" => ((
                     "bin-path" => "/usr/bin/php-cgi",
                     "socket" => "/tmp/php.socket"
                 )))
Finally, we need to restart the lighttpd service by running:
sudo /etc/init.d/lighttpd restart
Output:
Restarting lighttpd by running:
sudo systemctl restart lighttpd
Now, open your browser and visit the IP address of your server.
http://<your_server_IP_address>/phpinfo.php Successful installation will show the PHP version along with extension details.

You may also like:
Final Thoughts
Congratulation! If you’re reading this, you have successfully installed Lighttpd on Ubuntu 20.04 LTS.
I hope you would find this tutorial on how to install Lighttpd on Ubuntu 20.04 LTS useful. Feel free to reach out to me with any questions or concerns.


Leave a Reply