Nginx is a high performance web server software. Many big brands like Google, Facebook, Microsoft, Apple, Yahoo! and LinkedIn prefers Nginx over Apache and any other web server. And why not, it is the most flexible and lightweight web server with some great features like reverse proxy and load balancing. In this tutorial, we will learn how to install Nginx on CentOS 7.
Prerequisites
Before we install Nginx on CentOS, we need to update the server software packages to the latest version by running the following command:
sudo yum -y update
How to Install Nginx on CentOS 7
Step #1: Add Nginx Repository
First of all, we need to add the CentOS 7 EPEL repository. To add that, run:
sudo yum install epel-release
Step #2: Install Nginx
As we have installed the Nginx repository in the last step, we can now install the Nginx using the yum command.
sudo yum install nginx
Now, Nginx will prompt you with yes or no option. Once you answer the yes, Nginx will finish the installation on your server.
Step #3: Start Nginx Web Server
If Nginx does not start on it’s own after installation, you can start the Nginx by typing:
sudo systemctl start nginx
After running the start command, you need to enable Nginx to start automatically on system boot. To enable, run:
systemctl enable nginx
To check the status, run:
systemctl status nginx
Step #4: Allow HTTP and HTTPS traffic
If you have enabled a firewall on your server, you need to allow the traffic for HTTP and HTTPS by running:
sudo firewall-cmd --permanent --zone=public --add-service=http
sudo firewall-cmd --permanent --zone=public --add-service=https
sudo firewall-cmd --reload
To verify that Nginx is running properly, you need to put your server’s IP address in the browser.
If you does not know the IP address of your server, you need to find the network interfaces on your server by typing:
ip addr
Once you run the above command, you will find a number of interfaces depending upon the hardware connected with your server. You need to look for the eth0 interface to reveal your server’s IP address.
Now you need to substitute the name of the interface you found:
ip addr show eth0 | grep inet | awk '{ print $2; }' | sed 's/\/.*$//'
Now enter the IP address in the browser:
https://IP_address_of_your_server
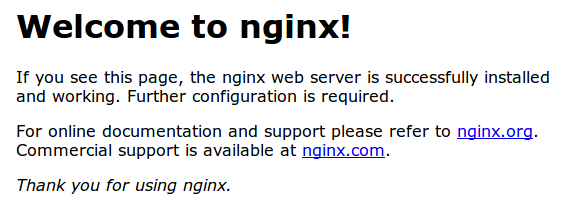
If everything went as planned, you will see a default Nginx web page with a welcome message.

Start, Stop and Restart Nginx
Whenever you make changes inside the Nginx configuration, you will need to restart or reload the Nginx depending upon the situation.
Start, Stop and Restart Nginx using systemctl
To restart the Nginx service:
sudo systemctl restart nginx
To reload the Nginx service:
sudo systemctl reload nginx
Nginx can also be controlled with signals. To reload the Nginx service you can use the following command:
sudo /usr/sbin/nginx -s reload
To start the Nginx service:
sudo systemctl start nginx
To stop the Nginx service:
sudo systemctl stop nginx
Start, Stop and Restart Nginx using SysVinit
To restart the Nginx service:
sudo service nginx restart
To start the Nginx service:
sudo service nginx start
To stop the Nginx service:
sudo service nginx stop
For more resources, you can checkout the official Nginx guide for CentOS.
More Such Guides on Nginx:
- How to Fix 403 Forbidden Error in NGINX Ubuntu
- How To Install NGINX on Ubuntu 18.04
- Fix 413 Request Entity Too Large Error on Nginx & Apache
- How to Secure Nginx Server with Fail2Ban on Ubuntu Server
- How To Install Nginx on Ubuntu Server 18.04 LTE
- How To Install LEMP Stack on Ubuntu 16.04
Conclusion
In this guide, you learnt how to install Nginx on CentOS 7. I hope you will find this tutorial useful.
If you have any questions or feedback, feel free to comment below.


Leave a Reply